You can also download it directly on the projector by downloading in Firefox.
You can also install it by adb: add install <path-to.apk>
How to use it?
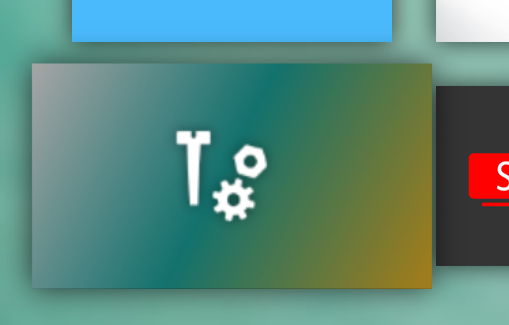
Start the app from the home screen. The icon looks like this:
Unfortunately it’s only in English at the moment, but self-explanatory.
You can use the arrow keys to go up/down the options and the left/right keys to adjust. You can also use the mouse (AirMote) or touchpad to adjust the options:
Test Image – a lot of test images are available in this app to help you assess the picture quality.
Looks – this is the only setting that’s totally safe to adjust. It adjusts the colours. Look 0 is used on battery power, Look 1 is used on AC power. The remaining Looks 2-19 each have slightly different colours. Flip through them to pick the one you like the most based on your preference / wall color / lighting etc.
R / G / B – these settings change the power supplied to the LEDs. Your adjustments here are independent of the Energy Saver / Normal / Presentation mode. Only change these if you know what you’re doing and have placed the projector in a well-ventilated area. The fan speed will adapt based on the LED power as you adjust it. There’s an extra +10% safety margin added so the fan may be slightly louder than normal.
Notes:
If you plug / unplug power while the app is running, the colours and Look might have changed but not reflected in the app. This is a known bug. Please press the BACK key to close the app and start it again.
Making these adjustments also affects the battery life.
How to reset the settings?
To reset all your adjustments, do these 2 steps:
Plug the AC adapter, wait for screen to flash, then unplug it.
Go to Projector Settings > Image > Brightness Mode and change the mode to something else.
These 2 steps will reset your adjustments back to defaults.
Will the settings be saved?
NO, the settings are only remembered temporarily till you restart the projector. Plugging the charger in or out will reset the “Look” value to 0 or 1. Changing the Brightness mode in the projector settings will reset the RGB values to the defaults.
A question: reducing the value of an RGB component slider would be as dangerous as raising it?
Are the values like the absolute current/power for the leds? or something else?
Since the fan speed adapts, reducing or increasing both have a similar effect as far as how ‘dangerous’ it could be. In my testing the temperatures are stable regardless of the adjustments, but a warning has anyway been added.
Yes, for RGB it’s the power supplied to the LEDs (the current). But the values are a 10-bit opaque scale, not a physical quantity, and the effect on brightness/temperature/current is not linear.
The Look is a colour adjustment directly in the DLP using PWM so it is independent of thermal performance.
I have observed that the brightness level is still different based on whether it is plugged in [bright] and when on battery power [dim].
Changing the RGB values all the way down when plugged in will yield a bright green image, whereas on battery power will yield a dimmer but rather viewable image.
Is there something that is a result of this? Cheers!
reset of the setting per instructions (plug, flash, unplug, change brightness mode)
reboot the ppm (doesn’t seem to matter but just for measure)
Start with the ppm plugged, mode “normal”
open the application, immediately fan speed goes to “presentation”/liftoff level of noise, image brightness seems “normal”, Look in the app is shown as 3 (i have not changed it!), red slider looks almost maxed out at 980. Hard to say if brightness actually changes when the app starts as the first image is very bright. I would bet on no.
Unplug, fan goes back to “normal”, if I exit and re-enter the app, Fan doesn’t change. Look is shown as 1: red channel is in the 600s.
Plug again, fan stays “normal”
Open app. Fan stays normal. Look is 3, red channel is 6xx. Image brightness is “normal”
I still have never touched the rgb sliders.
something similar happens if I start from ‘power saving’, first time I launch the app the fan goes to “normal” level until I unplug/plug ac.
on my projector, plugging/unplugging AC switches between Look 1 (unplugged) and 3 (ac).
fresh starting the app after a reset, brings the fan, but not not the brightness, to the next level. For instance, if I start the app in power saving, it spins the fan at “normal” speed. If I then go to Image settings and switch to “normal”, the brightness changes up, the fan stays at same speed
In power saving starting the app when on AC always spins the fan to “normal”. Starting the app on batter only the first time.
In normal, starting the app either on AC/battery spins the fan to “presentation” only sometimes but always does on the first run.
Plugging/unplugging while the app is running seems to be a factor, too.
I installed the app and did a first impression run. Straight out of the box it’s not that intuitive, perhaps one of the test images could include some instructions in a later iteration?
The looks 1 and 3 look different, all the others appear the same to me. I’ll test this further tomorrow.
Hi guys thanks a lot for the feedback. Think of this app as “write only”, it doesn’t reliably read and update the UI based on external events. But it will write the values correctly when you change them.
So I tried the color adjustment app, here are my takeaway.
Pro
Good selection of pictures for calibration
Intuitive UI. (Easier what the existing image adjustment setting for brightness / contrast… using up and down around for adjustment is not really intuitive)
lots of available “Looks”
Cons
no brightness / contrast / saturation available within the app for a full control of image setting in one place
UI a bit small
I have Green flash when switching between “looks”
“Looks” actual setting is not reflected in the rgb setting below so we don’t know what actually changed. But I did notice a difference in image colors between all the “looks”
I find the word “Looks” a bit inaccurate. Maybe it should be renamed “Preset”
@Philips_Support_P explained that Looks and RGB settings are not related and entirely independent. The RGB sliders actually change the current going through each LED in the light source, thus modifying how bright they are (and how hot they get). In this way you can make the light source “more red” or “less blue”, by adjusting the relative brightness.
Looks are instead an image processing feature of the DLP system. If I understand correctly they are part of the “color coordinates adjustment” system in then DLP chipset. In this case, color is adjusted by changing how the mirrors in the dlp move.
Thanks for the explanation. But then I wonder how to have a visual indication of the “Looks” impact on top of the image provided. Sometimes the difference is very subtle.
I can confirm that the fan kicks off harder once you open the app even without changing anything.
My initial impression is that this isn’t something that would be appropriate for mass consumer use.
I just feel like it looks and works a bit intimidating for normal users. Not sure what’s the exact plan for rolling this out to users.
The overall feel of the app is like a hidden “factory” settings app or something.
The UI needs to be bigger. I think this will be fixed with the scaling change of the whole system.
“Looks” are labeled as numbers which is quite hard to tell the difference and know when to use them. Not sure if the intention is the same but normally we get Cinema, Vivid, Game, Sports, etc.
The navigation is fine but it would be better if the selection of the image is easier instead of going through them one by one.
It’s hard to tell which “look” looks better since it’s not easy to perceive differences between all of them without comparing side by side.
Nevertheless, I feel “0”, “3” and “14” quite natural and pleasant (don’t ask me why)
Did I win?
Anyway, fan noise increase prevents me from testing thoroughly.
The app has turned out to be very helpful and helps improve the image to a great extent, but it’s super annoying to manually set this again and again every time the projector is turned on. I’m not an expert in Android programming, but speaking from experience with other apps, surely it must be possible to have the app autorun in the background when the projector starts and save its settings in a logfile?!