!! STOP !!
Before you preform this procedure, do a factory reset through the recovery system to see if it solves the problem. Only proceed if a factory reset does not solve it.
How to do a Recovery Factory Reset
Warning: all your apps and settings will be erased. However, any software updates and preloaded apps will stay.
- Power off the projector
- Insert a pin or SIM eject tool in the Reset hole (see picture below), till you feel the reset button press.
- Keep it pressed and press-and-hold the power button to start the projector in Recovery mode.
- Once it starts in recovery mode, use the remote control to select “Wipe data/factory reset” option.
- After the reset is completed, reboot the projector.
If this procedure doesn’t help, proceed to do a full cable restore.
Continue to perform a cable restore
This procedure should only be performed if instructed to do so. It will erase all content on your PicoPix Max and restore it to the factory settings based on the current firmware.
You do not need to open the projector, this repair can be performed with just a USB connection.
What you need
- a USB-A male to USB-A or C male cable (to connect your PicoPix Max to your computer). Something like this:
https://www.amazon.com/UGREEN-Transfer-Enclosures-Printers-Cameras/dp/B00P0E3954 (This type of cable is often used to connect external hard drives. If you don’t already have it, it should easily be available from your local electronics or PC parts store.) - A thin paperclip to press the reset button.
- A PC with Windows installed on it. If you only have a Mac, you will need to borrow a Windows PC. Virtual machines may not work correctly.
- Two software tools: The AndroidTool, and the DriverAssistant.
Download AndroidTool
Download DriverAssistant
- The firmware file downloaded to your computer.
Download v1.3.0 restore image 2.26 GB
Alternatively, you can download older versions:
Download v1.2.4 restore image 2.14 GB
MD5 checksum: 737e05aca534a8dcf486bf2c5f35626f
SHA checksum: 56bc236510e4136fed32a5d55cc46d8606ccb6ca
Download V1.2.1 restore image 2.0 GB
Download V1.1.03 restore image 1.99 GB
Procedure
Note: Before starting, make sure your projector is fully charged. You may also keep the charger connected while you perform this procedure.
- Please unzip the DriverAssistant.zip file on the PC. Then, run the
DriverInstaller.exeinside it to install the USB driver. - Please copy the AndroidTool folder to the same PC.
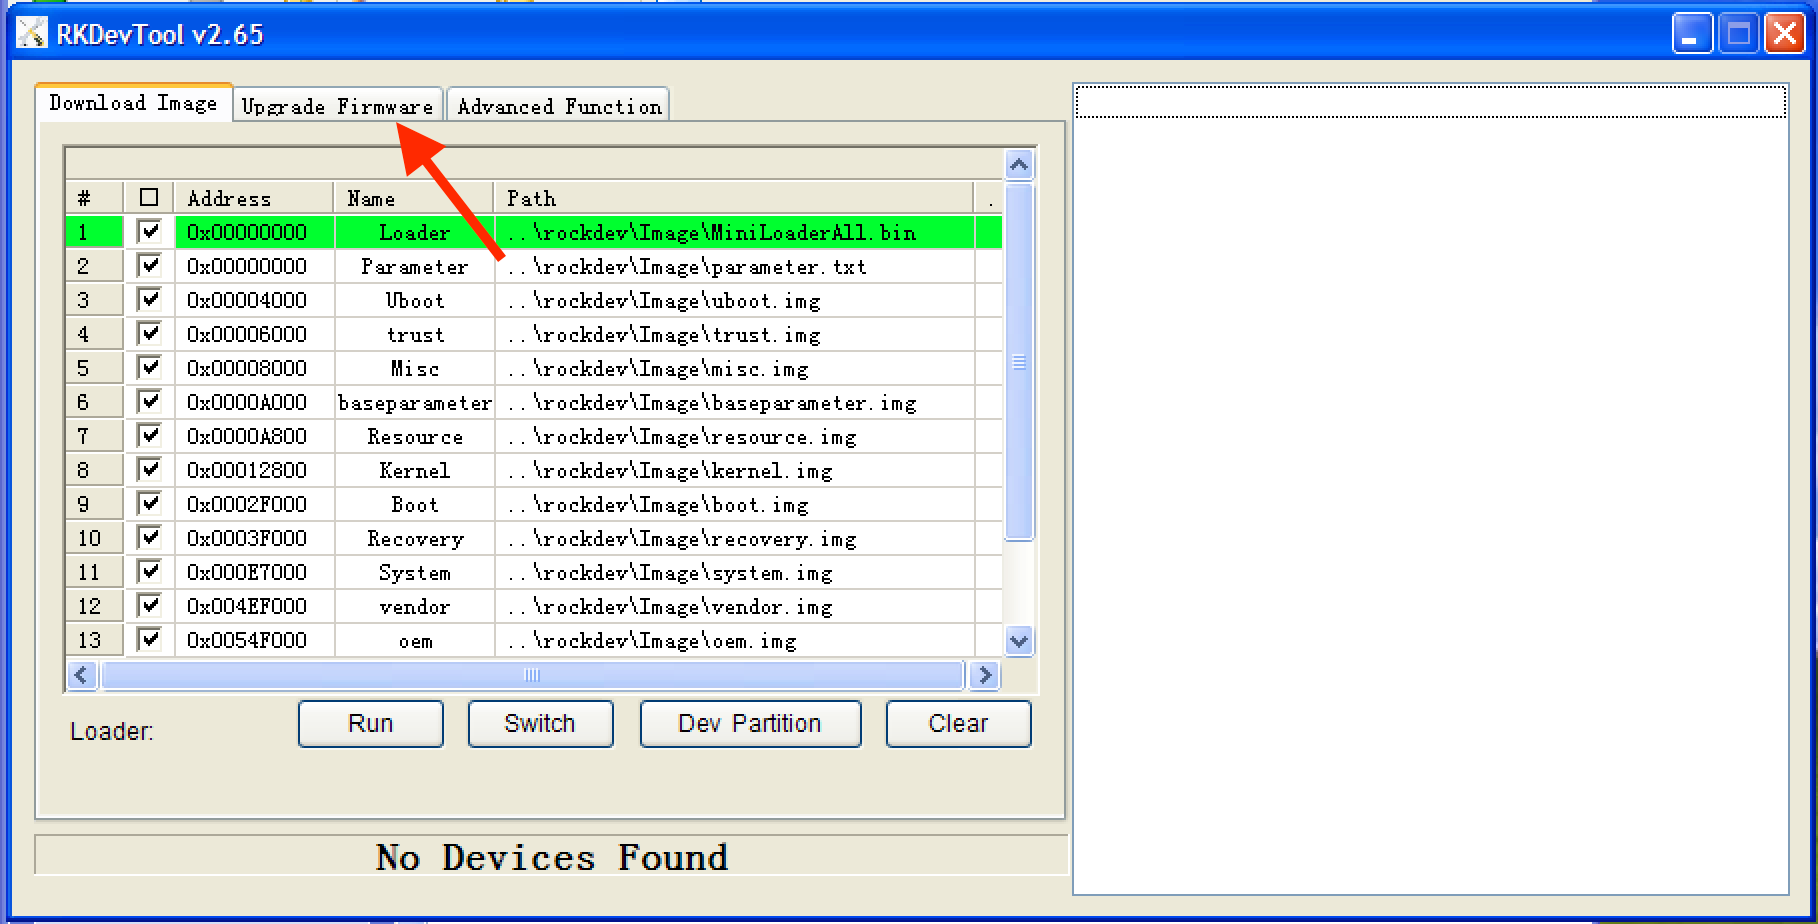
- Start the “AndroidTool” and go to the Upgrade Firmware section.

- Power OFF the projector, then connect it to your PC using the USB cable. Now, insert the paperclip inside the reset hole (close to the power port). See picture:

The paperclip will press a button inside. Keep it pressed, and power ON the projector by pressing the power button on it for 2-3 sec. You will see the Blue LED come on, but there will be no picture and no fan noise.
- On your PC, you will see the RKDevTool 2.65 shows “Found one LOADER device” at the bottom. Now you can remove the paperclip.
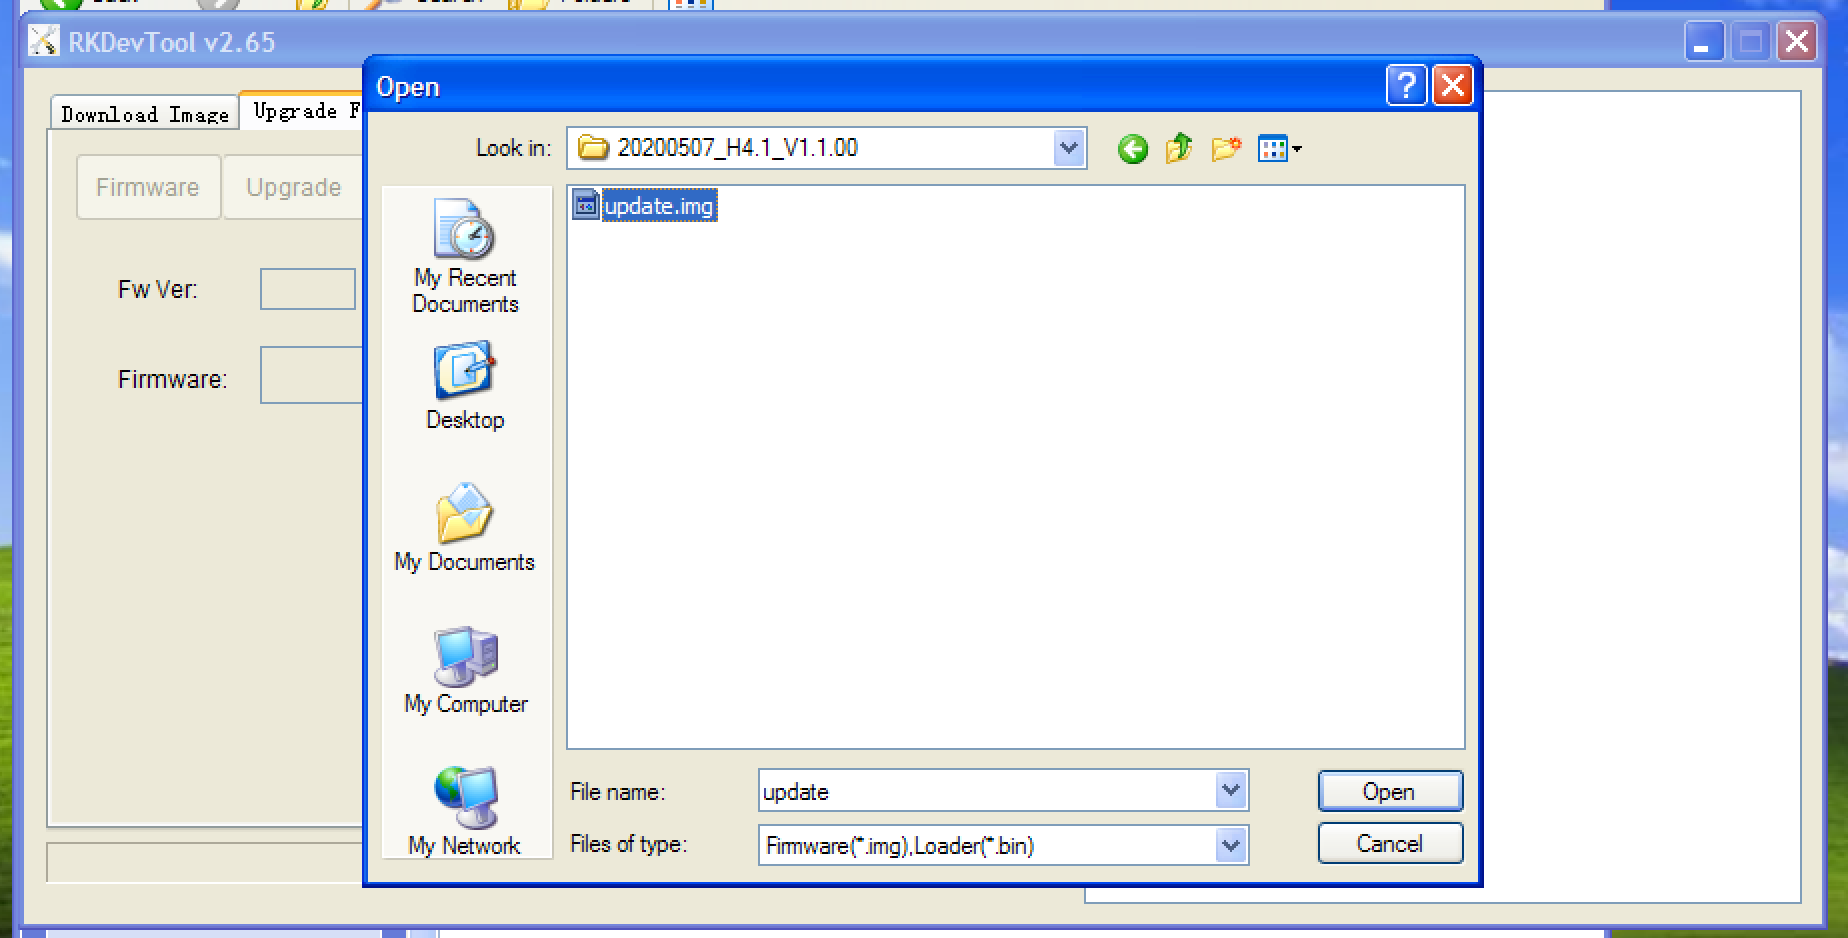
- Now, click the “Firmware” button and select the
PPX620-v1101-restore.imgfile you downloaded.
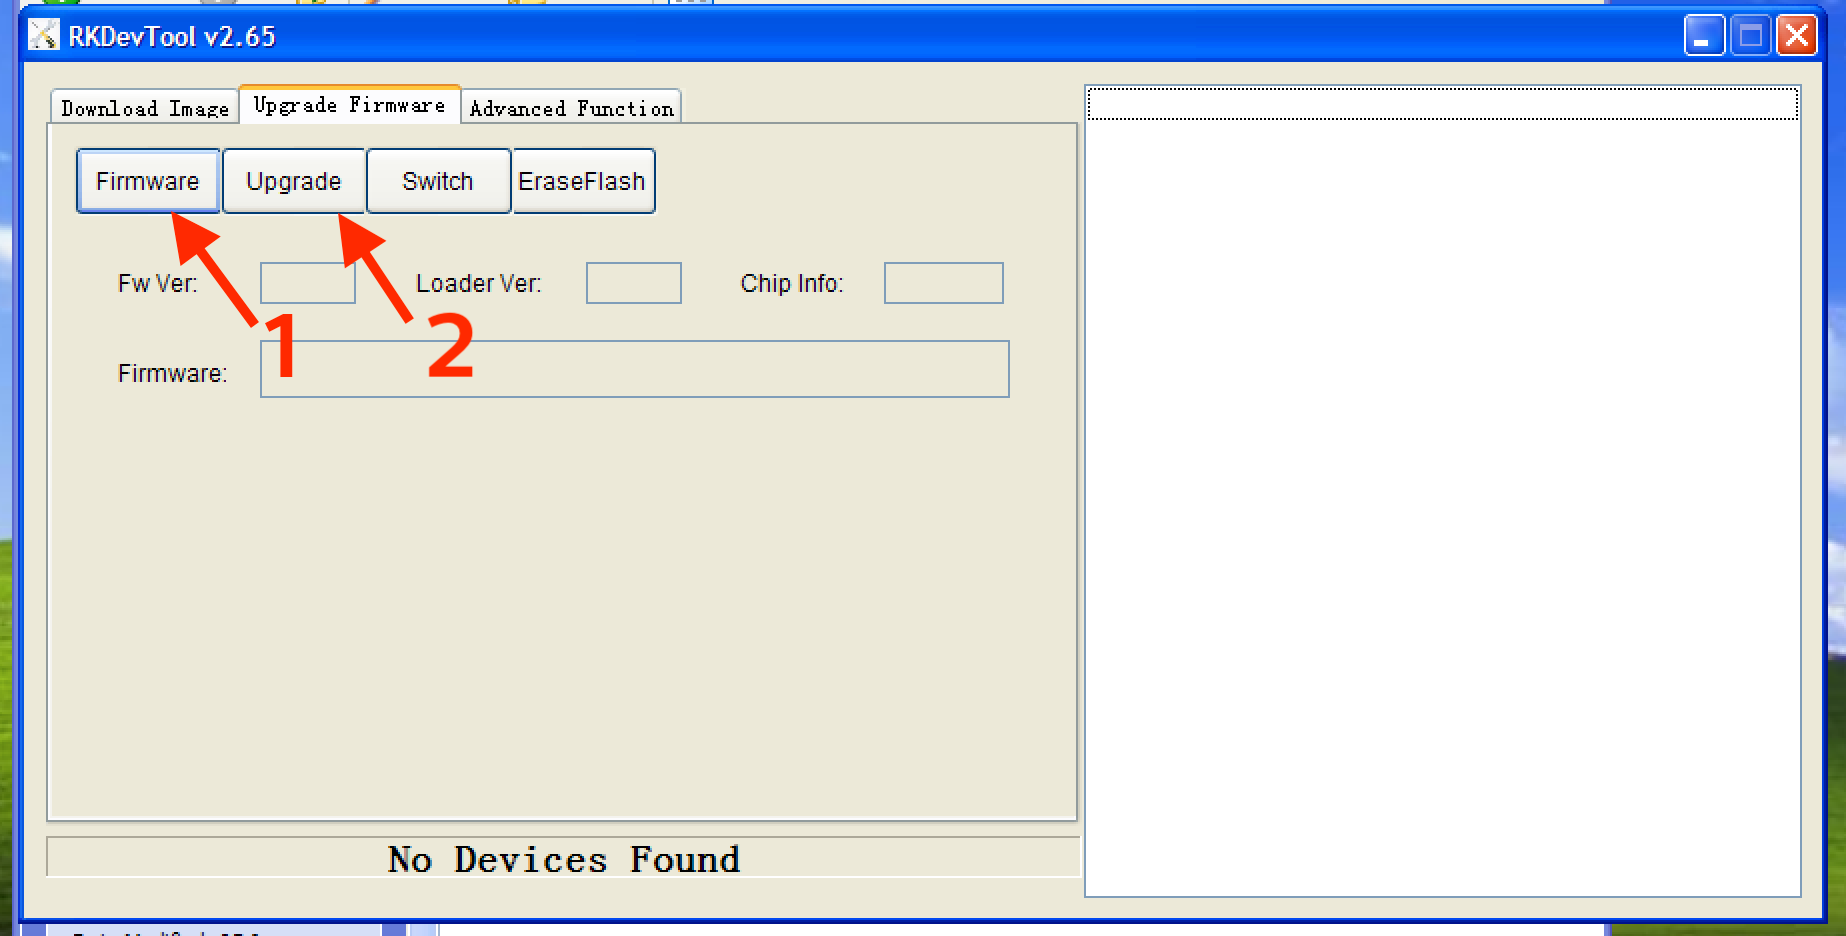
- Click “ Upgrade ” button. You will see the upgrade progress on the right side. It will take around 10 minutes.
- Once the upgrade has completed successfully, unplug the USB cable. If the projector is still on, press and hold the power button on it, for 30 seconds, till the blue LED turns off.
Now your projector has been restored. Power it on like usual. Note that any data or apps you may have installed will have been erased.